Now that we are all working remotely, we need a way to manage software upgrades on all of our endpoints. For me, the vast majority of the endpoints are running IGEL OS, so we need to be able to not only upgrade the firmware, but also the custom partitions that have been deployed. Enter the Igel Cloud Gateway (ICG) + Amazon S3
I covered how to upgrade the OS via ICG in a separate blog post
For this example, we are going to deploy Microsoft Teams latest build by using some scripts found in the IGEL community GitHub repository.
Before we start, there are a few things you are going to need.
- Access to a machine running Ubuntu OS. This is needed to run the packaging script
- Administrative access to IGEL Universal Management Suite (UMS)
- Access to an S3 bucket where you can upload the custom partition files that are to be deployed.
The first thing we are going to want to do is to grab the components needed to download the latest version of MS teams directly from Microsoft. On my ubuntu machine, here are the commands that were executed to make this happen. These commands are executed in the terminal
cd Downloads (move to the Downloads directory)
mkdir Teams (create a directory for our Teams build)
cd Teams (move into the Teams directory in preparation for launching our script_
wget https://raw.githubusercontent.com/IGEL-Community/IGEL-Custom-Partitions/master/CP_Source/Unified_Communications/Microsoft_Teams/build-teams-cp.sh This downloads the script that is needed to grab the bits from Microsoft

We now need to make that script executable
chmod a+x build-teams-cp.sh
![]()
Now we are ready to execute the script by using the following command.
time ./build-teams-cp.sh
The only reason I added ‘time’ of the start of the command, as it times how long it takes to execute. The author of the script (Ron Neher of IGEL) was able to get it to run in 42 seconds.
![]()
Off she goes!

I know it is not a race, but it kinda sorta is.
Bam - 39 seconds. Not bad for my ghetto lab environment. So, what next? If you have a look in the Teams directory (ls -la), you will see that we now have files that can be used as part of your custom partition, with the two main files being teams.inf and teams.bar.bz2. We will also need to have a gander at the teams-profile.xml which will need to be imported to UMS, so let’s do that first.

Importing the profile is pretty straight forward. In the UMS, head to System - Import Profiles. Browse to the location of the .xml file that was created. If done correctly, you should see something similar to this.


Now in UMS, you can see that there is a new profile called Microsoft-Teams-25560 CP. As the settings here assume we are going to be deploying the CP via UMS, we need to edit this profile. Before we do that, we need to get the actual bits for Teams into a public S3 bucket. Amazon has this well documented here , so I will not go through that process.
Once you have your bucket, you need to upload the other two core files that were created by the script we ran earlier (teams.inf and teams.tar.bz2). These two files need to be made public. Once they are in S3, you will need to get the public URL for the teams.inf file. It will look something like this (https://s3.amazonaws.com/bucketname/teams.inf). Before going any further, take that URL and paste it into a browser - it should return the contents of the teams.inf file. If it does not, chance are that your buckets permissions are set incorrectly.
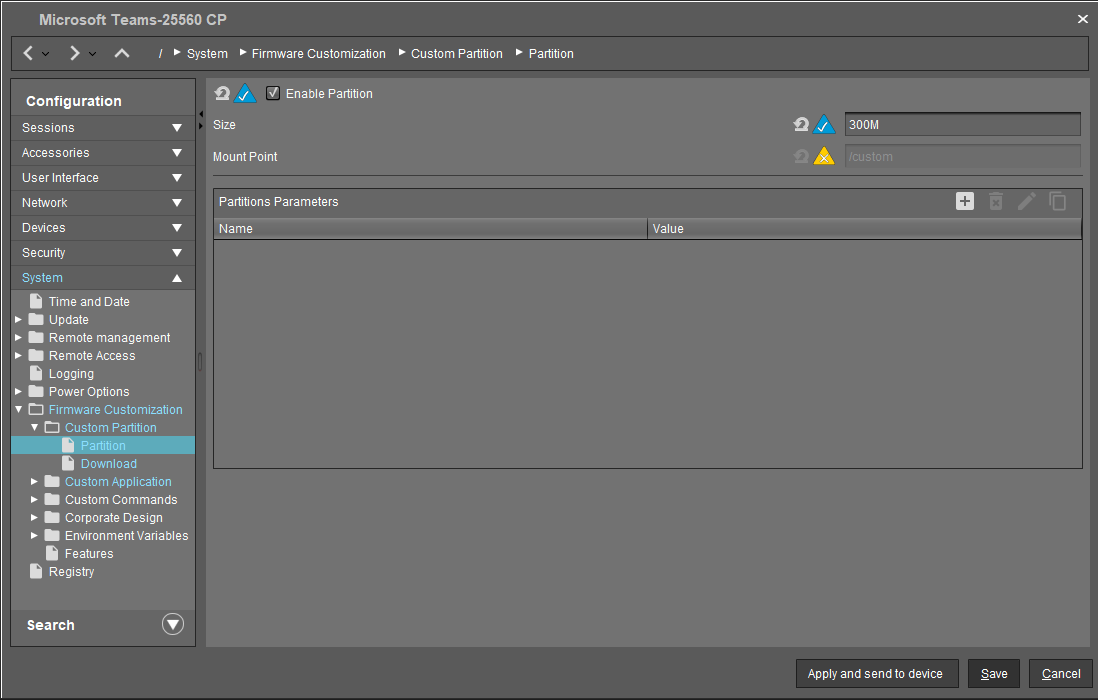
If successful, then we need to edit the profile in the UMS console, so let’s do that. Let’s look at each setting one by one, to see what needs to change in order to download the files to your thin client from Amazon S3.
This all looks fine, setting a CP size of 300MB, with a mount point of /custom
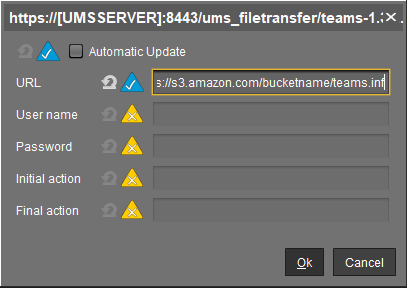
In the Downloads area, we are going to need to make some changes, as you can see in the screenshot below, the files will be downloaded from the UMS. If my thin client is in the field, it will not be able to access the UMS, so let’s edit this section.

In the URL field, simply paste in the S3 URL that we got earlier, and remove the other entries. When done, it should look like this.
That’s it, we are now ready to deploy. We simply need to assign the profile to a thin client, and let the magic happen. Here is a quick video of what it should look like.