Part 1 - The Hardware
So, you have always wanted to learn more about Citrix, and what better place to start than having your own home lab. So, let me walk you through the setup. There are several things that you will need in order to get started.
- Host. This is the physical hardware that you will run your Citrix environment on . In my case, it is a desktop with a 256GB SSD, a gen 5 i7 Intel processor (3.1ghz), and 16GB of RAM. Not crazy requirements for a basic home lab. If you have serious ambitions for your lab (fault tolerance, etc), then you are going to need to open your wallet for more RAM, or another host.
- Hypervisor. If you are a Citrix customer, you are entitled to run Citrix Xenserver, (or as it is now known as Citrix Hypervisor). However, for my lab, I am more familiar with VMWare, so I have installed vSphere 6.7.
Once you have those two elements in place, you are ready to start the deployment. In my lab, I am running three VM’s for each of the mandatory backbone components. A domain controller, a Citrix Delivery Controller and a SQL server.
As this is a lab, I am planning to co-locate the Citrix Licensing Server, and Citrix Storefront server on the same virtual machine. Once we get further down the road, we will need more machines for either or Server Based Computing (SBC), or our Virtual Desktop Infrastructure (VDI environment). At some point, I will be adding Citrix Workspace Environment Manager to the lab.
Part Two - Active Directory
The core of any Citrix Deployment is active directory, so let’s proceed with configuring our Domain Controller. We started with a vanilla 2012R2 Evaluation ISO. Once we have the machine booted, we need to add the Active Directory role to the machine via Server Manager
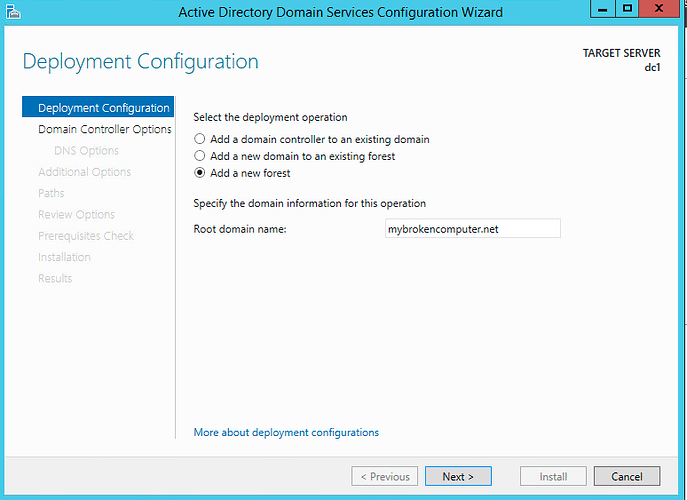
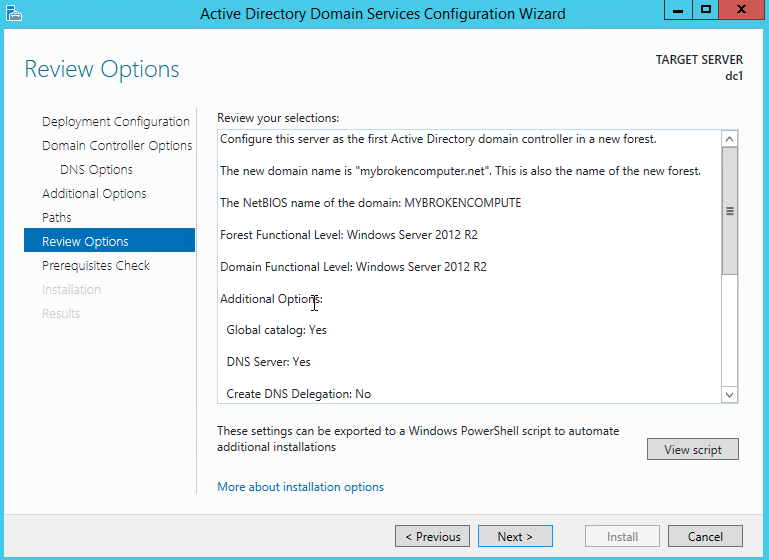
As this is a brand new lab deployment, you can see that we are creating a new forest called mybrokencomputer.net
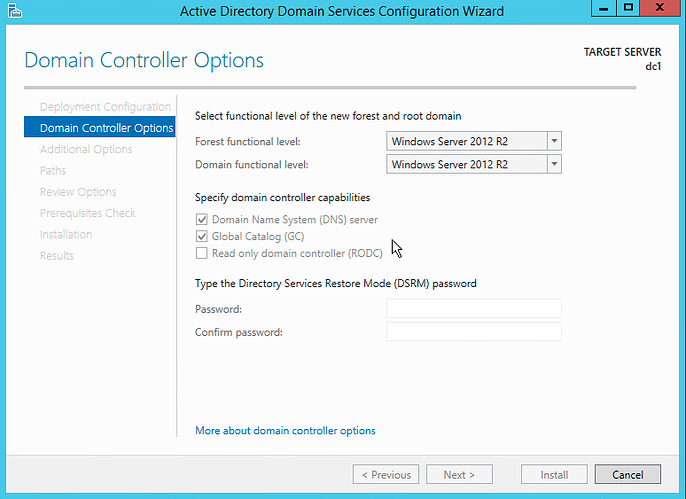
As we are running Server 2012R2, we are going keep the default functional level of our Active Directory installation at 2012R2
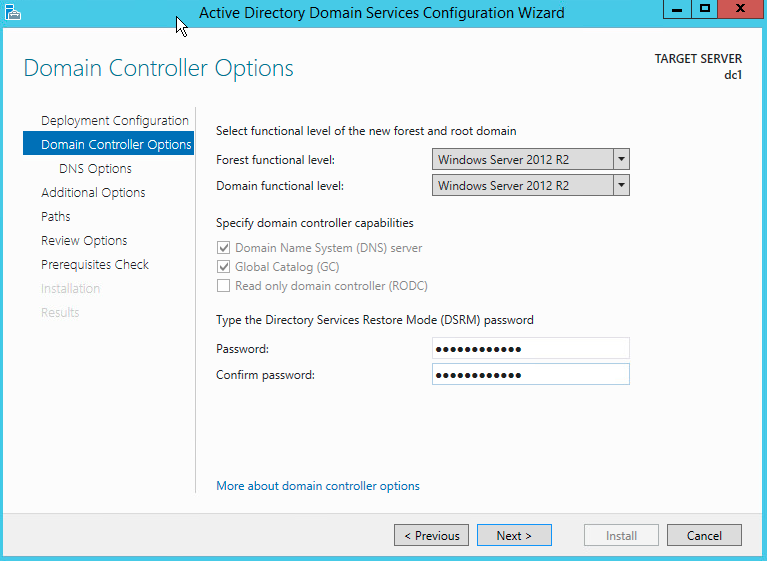
Pop in the password you would like to use for Directory Services Restore Mode, which is exactly what it sounds like. You will need this password if you have to restore your directory.
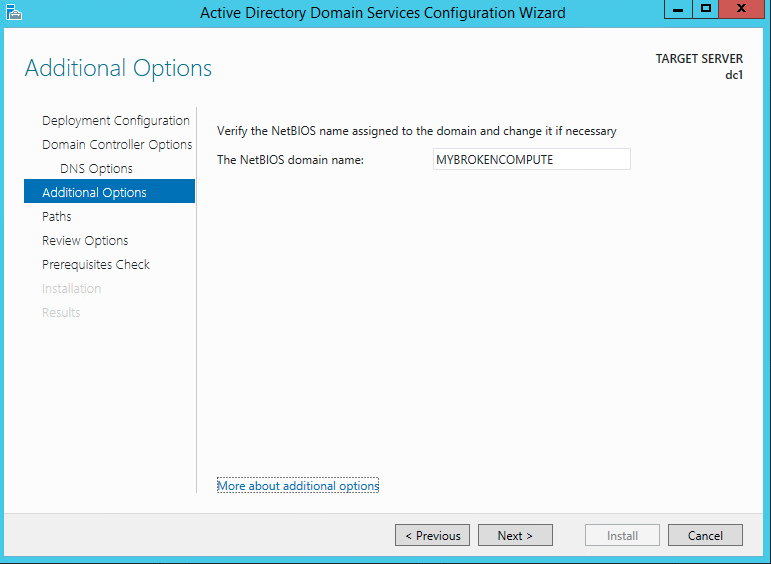
Verify that he NETBIOS name is good, and hit next.
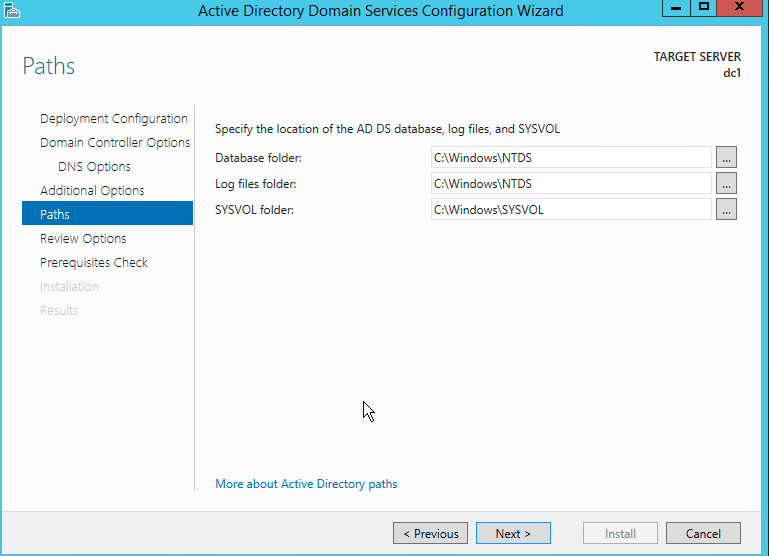
Here you need to set directories for the Active Directory DS Database, log files and SYSVOL directories. I highly recommend that you do NOT change these values in a lab. Remember the KISS (Keep It Simple Stupid) principal.
One final verification screen where you can check that everything is as it should be.
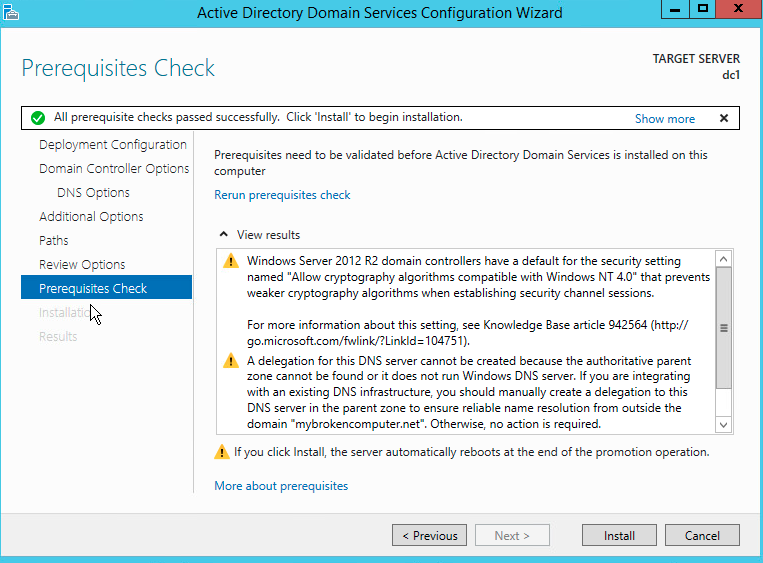
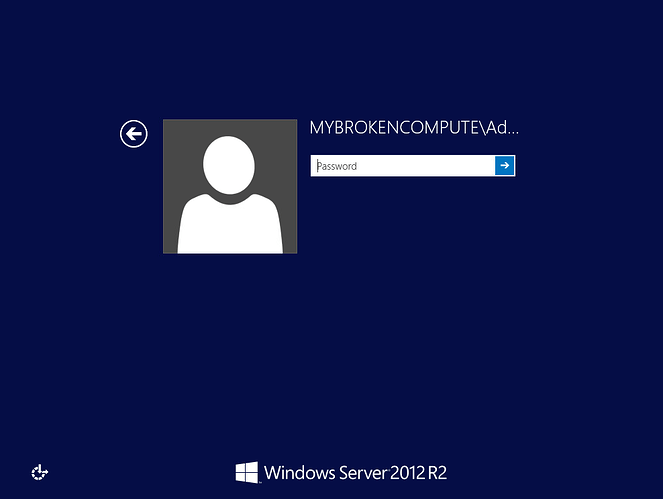
This one looks to be quite a scary screen, however there is nothing to worry about here, hit install and go get some coffee. This took about 10 minutes in my lab, including the mandatory reboot. After the reboot, we are no longer logging into the Server OS as the local admin, but rather the domain administrator.
Thats it for the domain controller configuration - now we need to move onto the second most important piece of any Citrix environment. The SQL database.
Part Three - SQL Server
The first thing we need to do is get that SQL server on the domain. Again, we are starting with a very vanilla installation of Windows Server 2012R2. So, like any other machine, we join to the domain, and reboot.
Once the machine has completely rebooted, we need to grab the SQL bits for the install. The latest version of SQL as of this writing is 2017, so let’s grab that here.
Microsoft SQL Server - US (English)

SQL Server Downloads | Microsoft
Get started with Microsoft SQL Server downloads. Choose a SQL Server trial, edition, tool, or connector that best meets your data and workload needs.
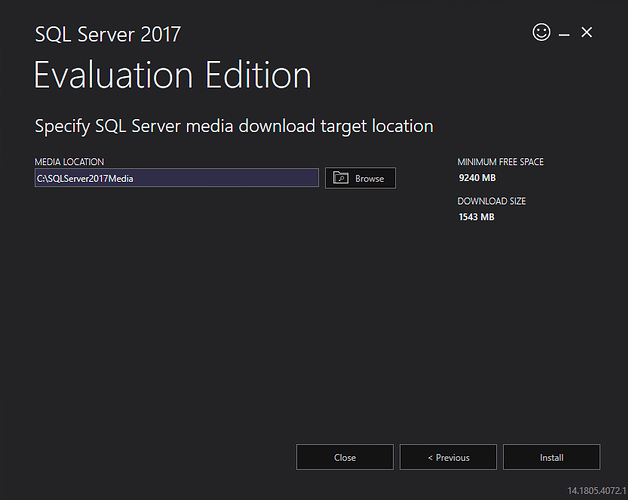
Once you kick off the installation, you are presented with a choice of which version to install. As I am curious by nature, I chose the custom installation to see what options are ahead of me.
Choose a location for the installation files to be downloaded to.
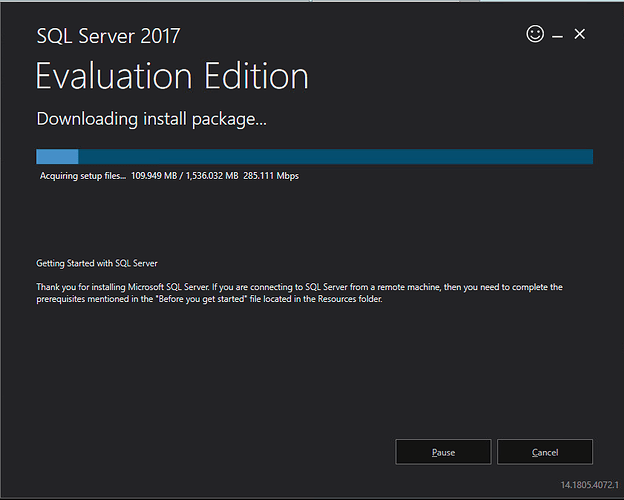
Let the bits fly!
Let’s now get in with the actual SQL installation.

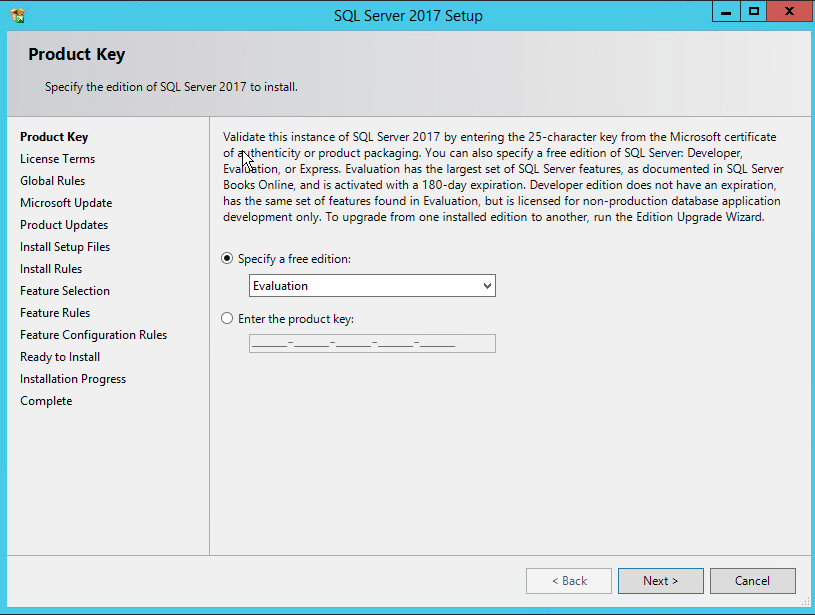
AS this is a lab, we are going to go with an evaluation license of SQL server 2017
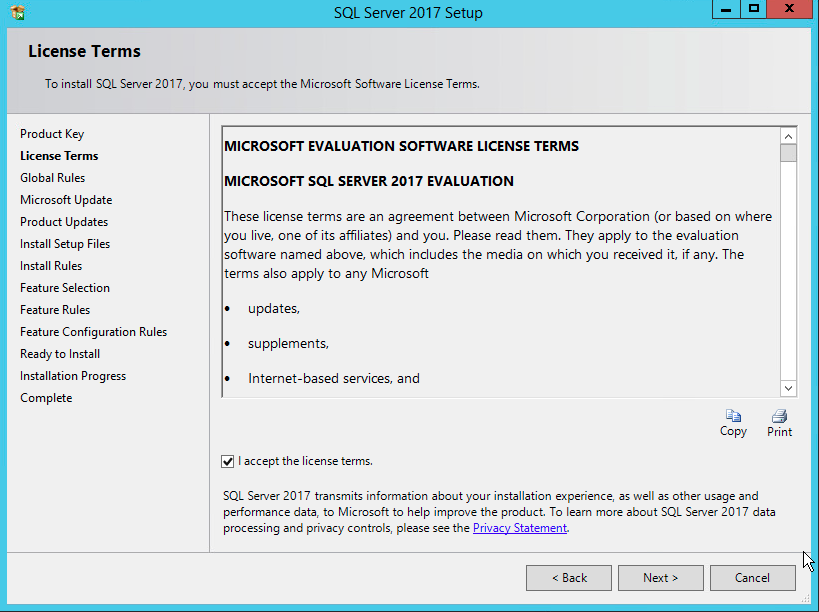
Time to make sure the lawyers salaries are justified, and agree to the license terms.
Now, SQL wants to check the internet to see if there is a newer version (patches) available. I do this out of habit, to ensure we have the most current version of SQL we are installing.
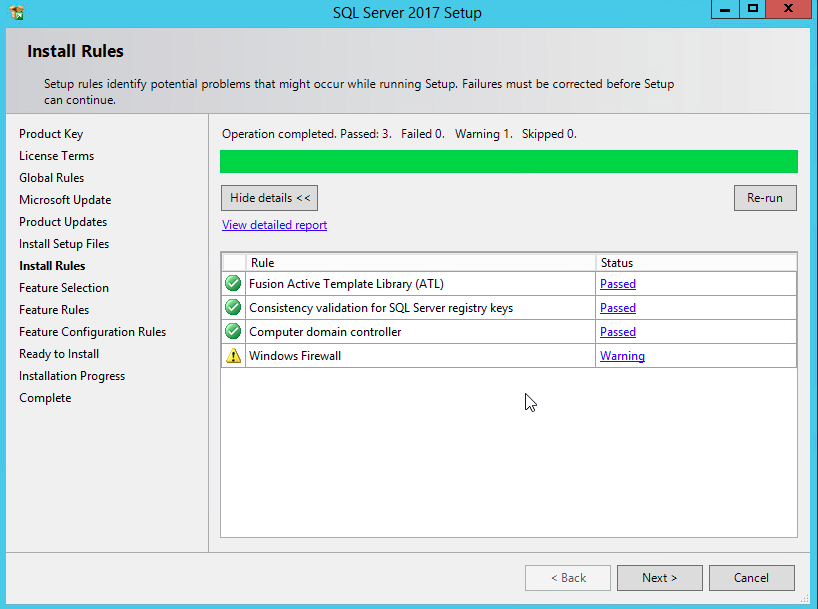
Once the latest version has been downloaded, we get an installtion health check to, which warns us of any issues that may impact the SQL install. In our case it is the local Windows firewall, which I will disable, as once again, we are in a lab.
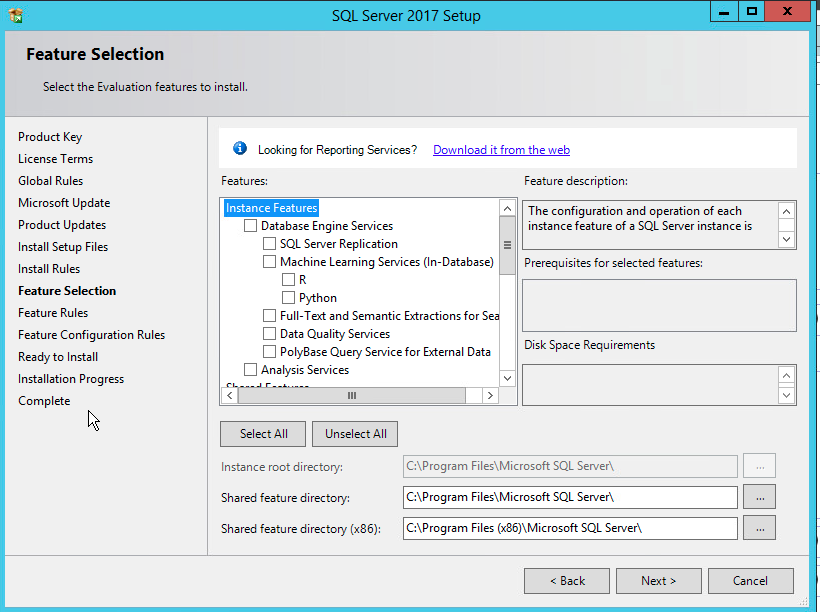
Now we are into the good bits. Actually choosing what we want to install.
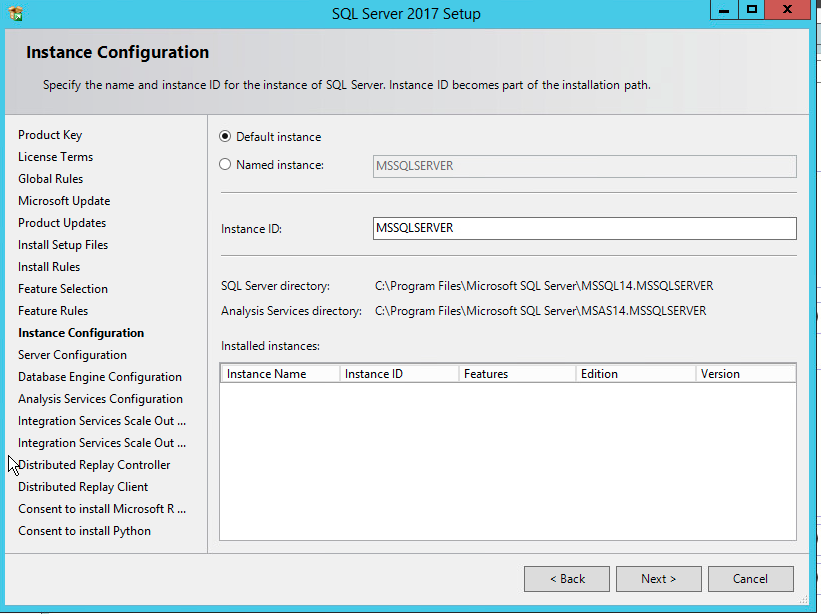
Again, this is a lab, so I install everything, and go with the default instance name of MSSQLSERVER
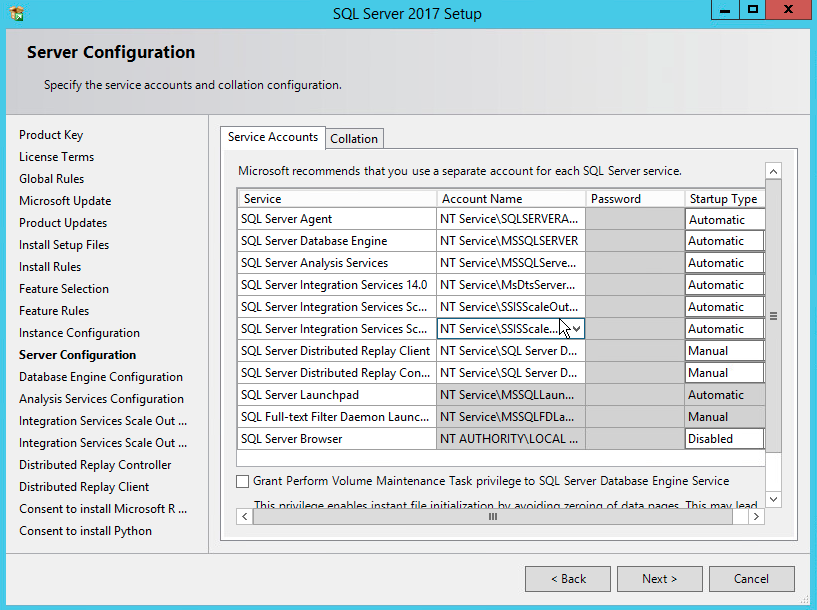
Next we need to configure the SQL service accounts. Default here is fine, as the core services will start up with the OS.
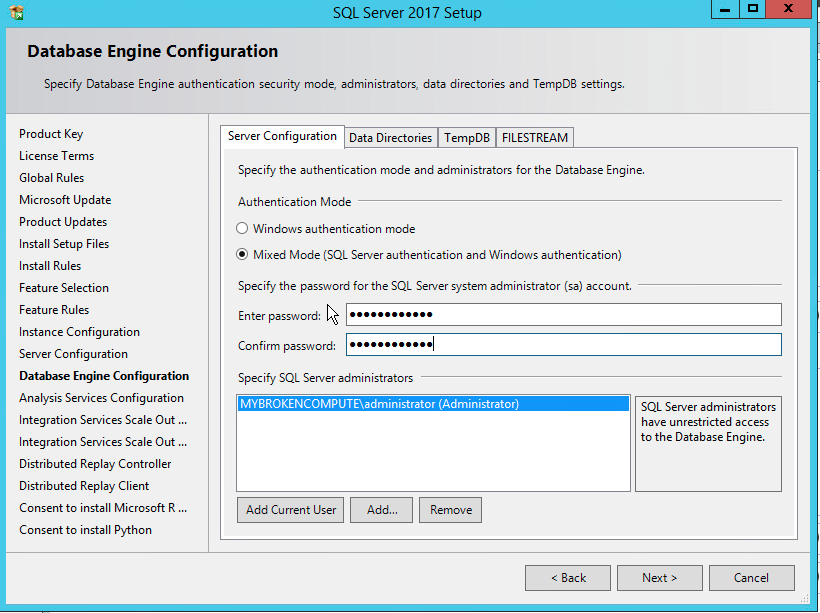
Now we need to tell SQL how/who can access the databases. I always like to use Mixed Mode (SQL Server authentication and WIndows Authentication), just in case anything happens the Active Directory environment, this will allow me to access SQL directly from SQL Server Management Studio
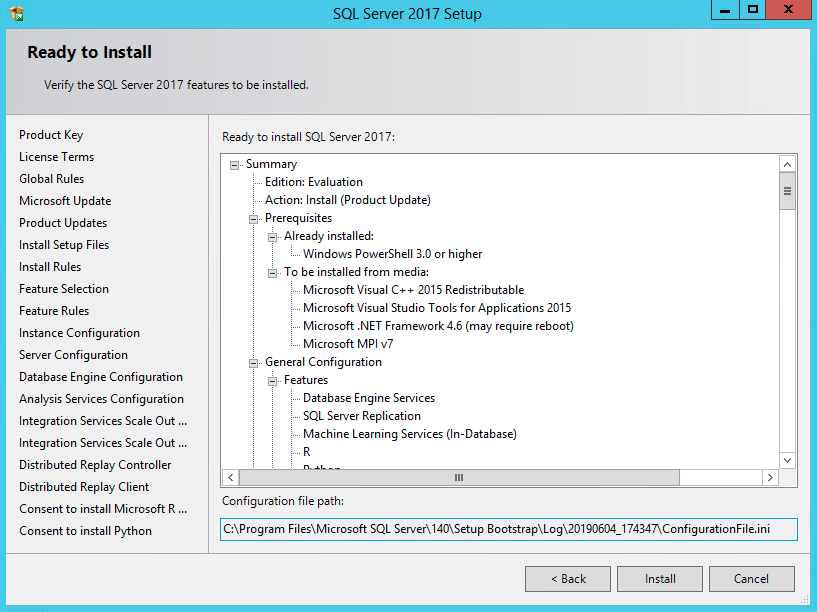
Finally - we are ready to install SQL. Get some coffee, as this took a good 15-20 minutes in my lab.
Part Four - Install Citrix Apps and Desktops (formerly known as Xendesktop).
In order to download the actual ISO file you need a citrix.com ID, which verifies your entitlement. Lucky for me, I have access, so I will grab all 2.54GB of the ISO file.
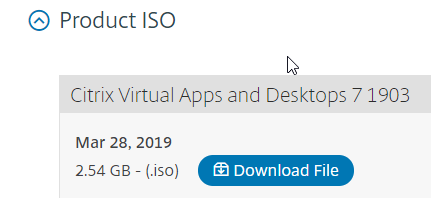
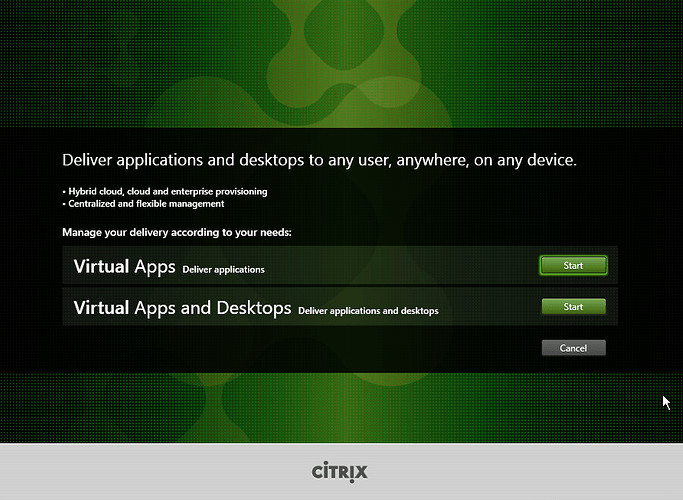
As my lab is running on VMware, I like to download the ISO to my local machine, and upload it to the datastore, so the VM will see it natively when we mount it as DVD/CD, and will be available each time the VM boots if the ISO file is still needed. Once we have the ISO mounted, the Citrix installer kicks off, with a new splash screen that I had not seen before.
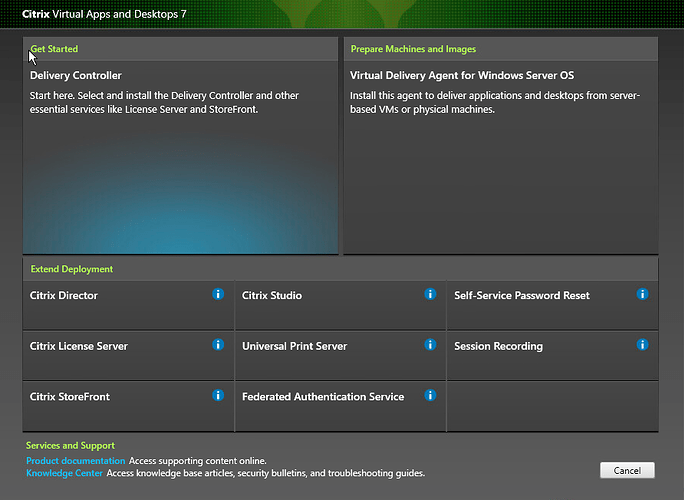
Followed immediately by the traditional Citrix Installation Window.
We are going to be installing Virtual Apps and Desktops, so let’s click on that, and begin choosing the options we are going to install. As this is a lab, we may as well install the kitchen sink. But it all starts with the Delivery Controller role, so let’s start there.
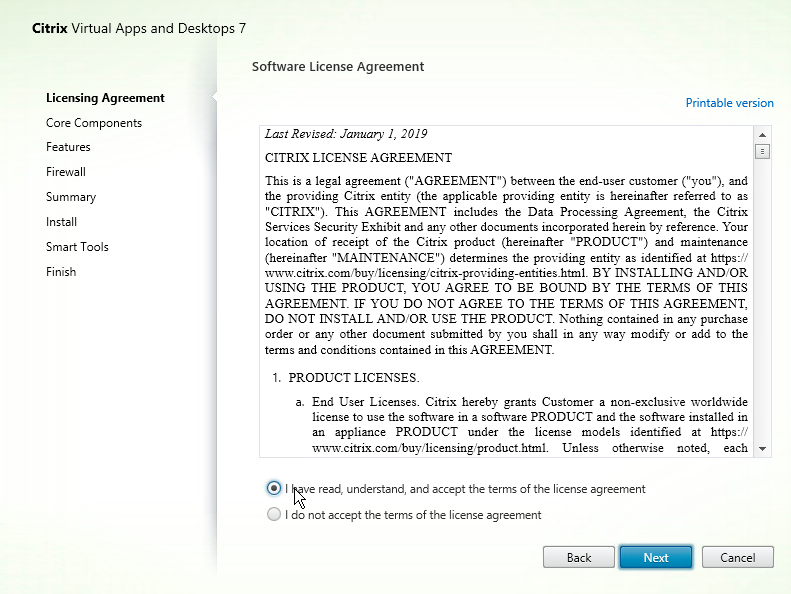
Again, we have to pay the lawyers, so accept the Citrix Software License Agreement.
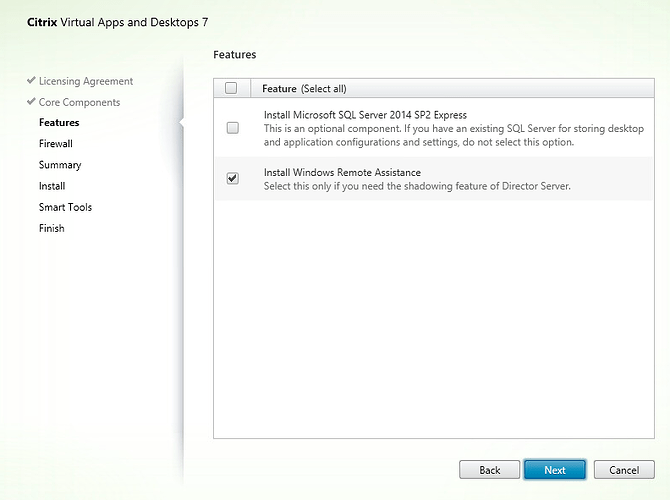
Yup - this looks like the kitchen sink of all things Citrix. Let’s install the following.
- Delivery Controller, which is used to distribute applications and desktops, manages user access and optimizes connections
- Citrix Studio. Create, configure and manage infrastructure components, applications and desktops.
- Director. Monitor performance and troubleshoot problems
- License Server. Manage product licenses
- Storefront. Provides authentication and resource delivery services for Citrix Workspace app, enabling you to create centralized enterprise stores to deliver applications, desktops. and other resources to users on any device, anywhere
We are then given the option to Install SQL 2014 Ex[ress SP2, however we are not going to use this, as we have a full blown SQL installation, that we are going to use for other Citrix components (looking at you Workspace Environment Manager)
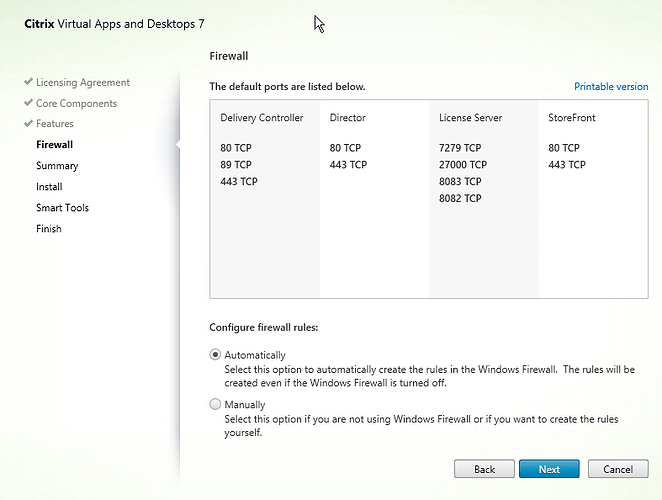
Then we must configure the Windows firewall to allow the appropriate ports to communicate. All of the major Citrix ports are represented here with the exception of ICA and ICA with Session Reliability.
The following ports need to be opened on your Delivery Controller, however as this is a lab, we are going to do it automatically.
-
- 80 TCP
-
- 89 TCP
-
- 443 TCP
-
- 7279 TCP
-
- 27000 TCP
-
- 8083 TCP
-
- 8082 TCP
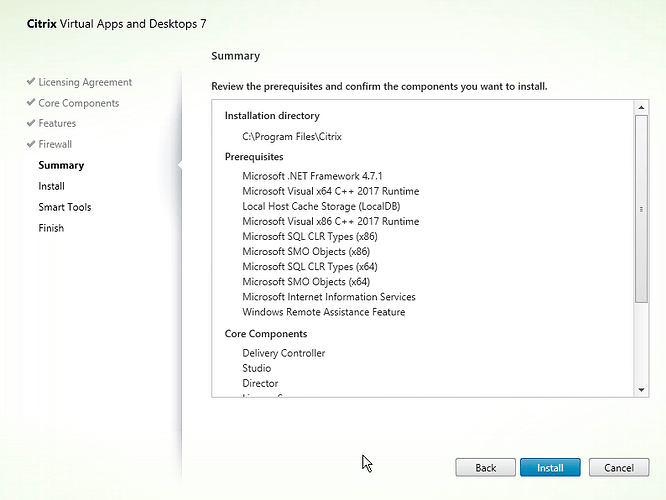
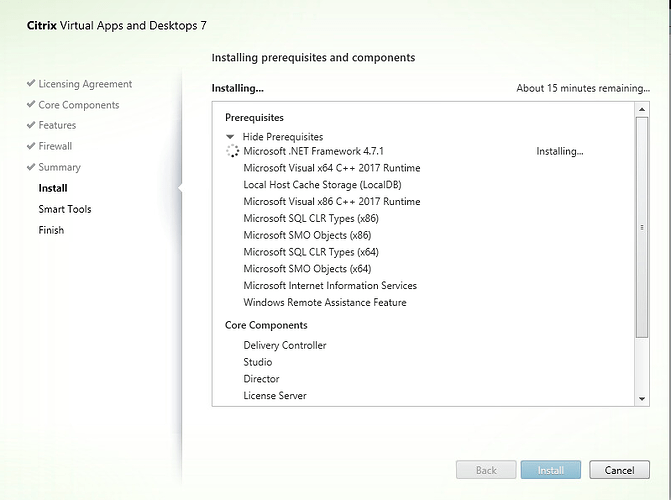
Before we kick off the installation, we need to review the prerequisites that are going to be installed for each of the Citrix components.
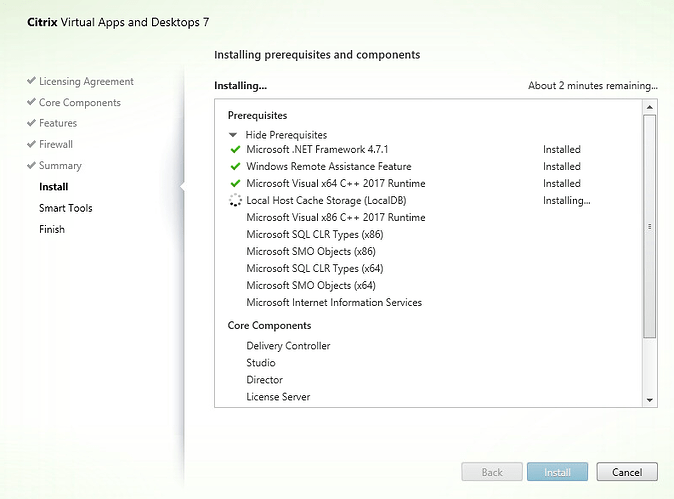
Give this installation a minimum of 20 minutes.
Reboot when the installer prompts.

After the reboot, the installer will continue with the installation.
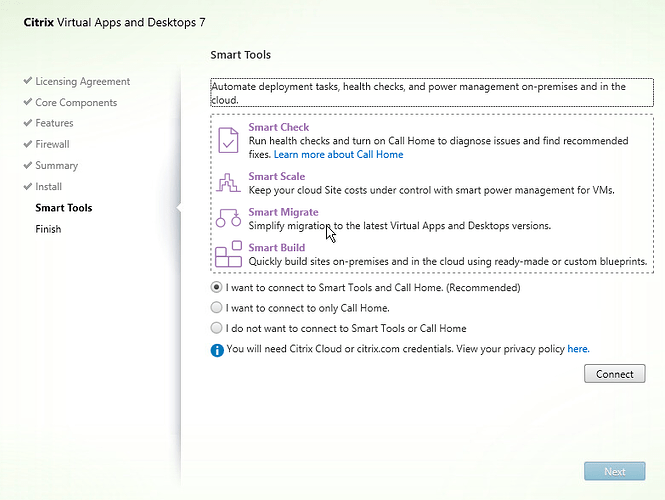
Towards the end of the install, we are asked if we want to participate in the Call Home program, and connect to Smart Tools. Again, this is a lab, so there is no need to do this. IN production, I would use the Smart Tools function as it can be quite handy.
And with that, the core components of Citrix are installed. Now we need to configure them
Part Five - Configure Citrix Studio
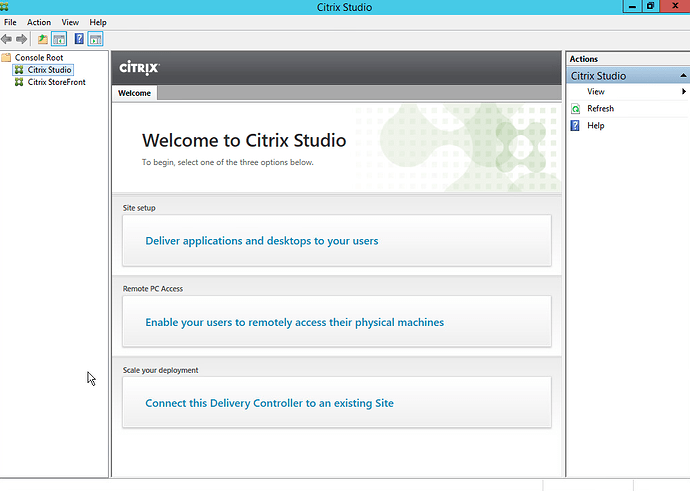
As we have mentioned before, Citrix Studio is the administrators interface into all things 'Citrix Virtual Desktops and Applications). Why can’t we still just call it XenDesktop. So much easier to type and say! Time to fire up Studio for the first time to begin the initial configuration. Here is what a vanilla installation of Citrix looks like, so we need to begin configuring the site, and the first thing we need to do is go through the ‘Site Setup’ wizard by clicking on Deliver applications and desktops to your users.
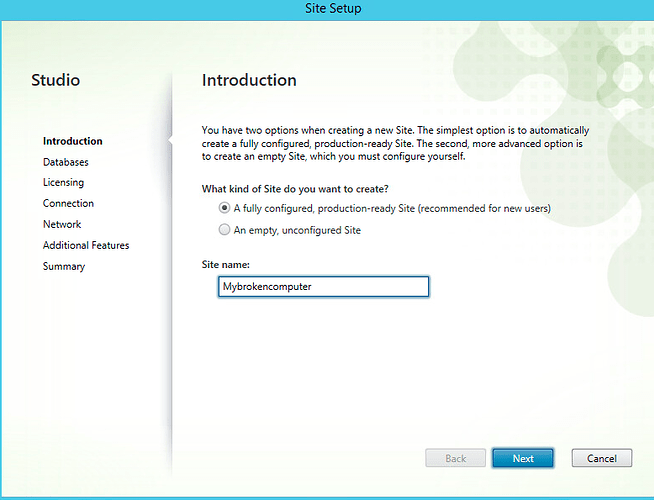
At the Studio Introduction screen, we are hit with an immediate choice.
You have two options when creating a new Site. The simplest option is to automatically create a fully configured production-ready Site. The second, more advanced option is to create an empty Site, which you must configure yourself. What kind of Site do you want to create?
We are going to create a totally empty site, as we like to do things the hard way, and we are here to learn. No point in going the easy route!
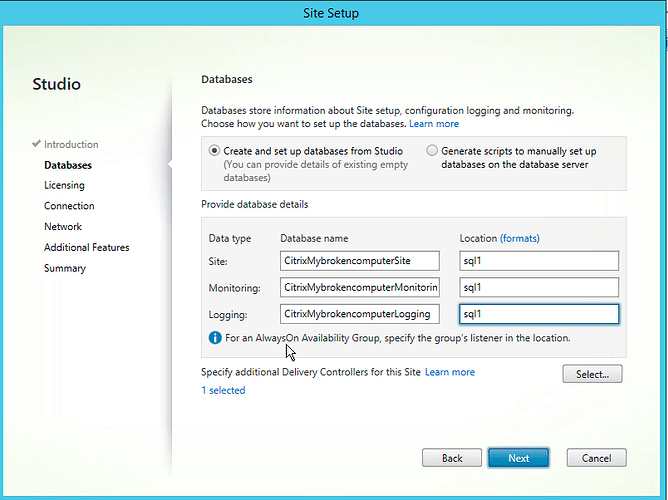
Now here comes the fun part, if everything we did during the SQL installation was successful, this part should be a breeze. We need to configure the three Citrix Databases. The site database, the monitoring database, and the logging database. We have two options available to use to make the SQL connection. We can do it directly from Studio if you have access to SQL, or you can generate scripts that can be manually run against the SQL server - this is usually done by a DBA in larger environments. For our purposes, we are gonna let Studio do the heavy lifting.
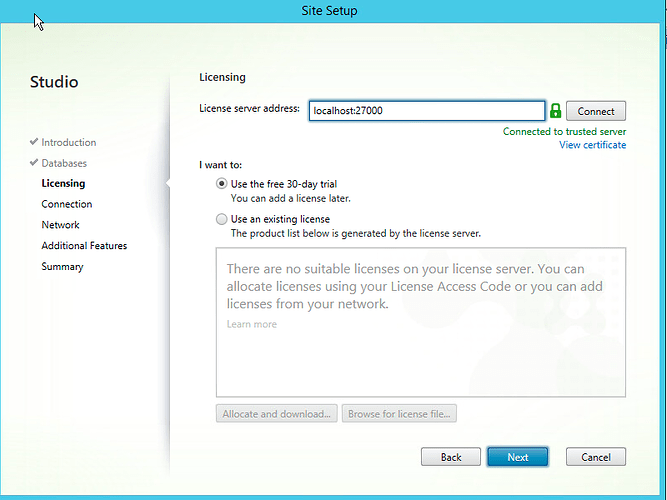
Assuming we have a successful connection to the SQL server, we are now asked to license the install. We are going to run with the default 30 day license.
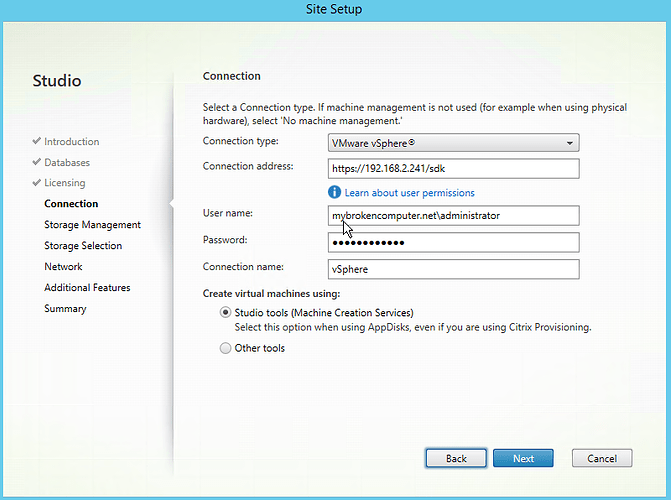
We now need to configure the hosting connection. In Citrix world, the hosting connection is how/where you configure your connection to your hypervisor to manage compute, storage and networking. In ou environment, we are connecting to it VMware vSphere. If we try to connect directly to the ESXi host, we are gonna have a bad time.
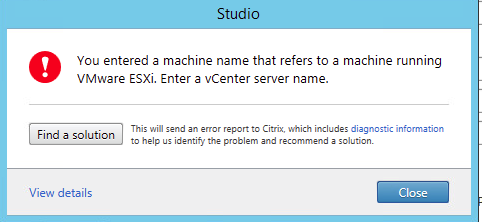
Error Id: XDDS:B51B673E
Exception:
Citrix.Console.Common.CitrixAggregateException One or more parallel operations failed
at Citrix.Console.Common.CitrixParallel.InternalForEach[TIn](IEnumerable1 items, Action1 operation, Int32 maxSimultaneous)
at Citrix.Orchestration.Base.PowerShellSdk.HypervisorService.Scripts.TestHypervisorConnectionScript.RunScript()
at Citrix.Orchestration.Base.PowerShellInteraction.PowerShellScript`1.Run()
at Citrix.Console.Hypervisors.UI.Pages.HypervisorDetailsPageViewModelBase.ValidatePage()
at Citrix.Console.CommonControls.Wizard.PageContainerViewModel.<>c__DisplayClass15_0.b__0()
DesktopStudio_PowerShellHistory : TestHypervisorConnectionScript
6/4/2019 11:10:00 PM
Inner Exception:
Citrix.Orchestration.Base.LogicModels.Exceptions.ConnectionNotVCenterException You entered a machine name that refers to a machine running VMware ESXi. Enter a vCenter server name.
at Citrix.Orchestration.Base.PowerShellInteraction.CmdletExecutionMethods.CreateException[T](ICommonLog logger, ExecutionResults1 results, ICmdletExecutionHost host) at Citrix.Orchestration.Base.PowerShellInteraction.CmdletExecutionMethods.Execute[T](ISdkCmdlet1 sdkCmd, ICmdletExecutionHost host, Boolean allowFailover)
at Citrix.Orchestration.Base.PowerShellSdk.HypervisorService.Scripts.HypervisorConnectionHelpers.CreateNewConnection(ICmdletExecutionHost executionHost, IUnityContainer container, HypervisorConnectionModel hypervisorConnection, Boolean persist, Boolean ignoreHA, String hostServiceAddress)
at Citrix.Orchestration.Base.PowerShellSdk.HypervisorService.Scripts.TestHypervisorConnectionScript.<>c__DisplayClass6_1.b__1(ICmdletExecutionHost host)
at Citrix.Orchestration.Base.PowerShellInteraction.SimplePowerShellScript.<>c__DisplayClass4_0.b__0(ICmdletExecutionHost host)
at Citrix.Orchestration.Base.PowerShellInteraction.PowerShellScript1.Run() at Citrix.Console.Common.CitrixParallel.<>c__DisplayClass5_21.b__0(Object arg)DesktopStudio_ErrorId : ConnectionNotVCenter Exception : PluginUtilities.Exceptions.VCenterExpectedConnectionException: Exception of type 'PluginUtilities.Exceptions.VCenterExpectedConnectionException' was thrown. Server stack trace: at Citrix.PoolManagement.VMManager.VmmImplementation.Vmware.VmwareVmConnection.SingleConnectionAttempt() at Citrix.PoolManagement.VMManager.VmmImplementation.Vmware.VmwareVmConnection.AttemptConnection(Boolean throwExceptions) at Citrix.PoolManagement.VMManager.VmmImplementation.Vmware.VmwareVmConnection.Start() at Citrix.PoolManagement.VMManager.VmmImplementation.Vmware.VmwareVmManager.StartMachineManager() at Citrix.PoolManagement.VMManager.VmmImplementation.Vmware.VmwareFactory.CreateMachineManagerInternal(IConnectionDetails connectionDetails) at Citrix.PoolManagement.VMManager.VmmImplementation.Vmware.VMwareHypConnection..ctor(IConnectionDetails details) at Citrix.PoolManagement.VMManager.VmmImplementation.Vmware.VMwareHypConnection.GetOrCreateConnection(IConnectionDetails details) at Citrix.PoolManagement.VMManager.VmmImplementation.Vmware.VMwareHypervisor.IsDumSupported(IConnectionDetails connectionDetails) at Citrix.HypervisorCommunicationsLibrary.AddInSideAdapter.IHypervisor_AddInViewToContractAdapter.IsDumSupported(IConnectionDetailsContract connectionDetails) at System.Runtime.Remoting.Messaging.StackBuilderSink._PrivateProcessMessage(IntPtr md, Object[] args, Object server, Object[]& outArgs) at System.Runtime.Remoting.Messaging.StackBuilderSink.SyncProcessMessage(IMessage msg) Exception rethrown at [0]: at System.Runtime.Remoting.Proxies.RealProxy.HandleReturnMessage(IMessage reqMsg, IMessage retMsg) at System.Runtime.Remoting.Proxies.RealProxy.PrivateInvoke(MessageData& msgData, Int32 type) at Citrix.HypervisorCommunicationsLibrary.Contracts.IHypervisorContract.IsDumSupported(IConnectionDetailsContract connectionDetails) at Citrix.HypervisorCommunicationsLibrary.HostSideAdapter.IHypervisor_ContractToHostViewAdapter.IsDumSupported(IConnectionDetails connectionDetails) at Citrix.Host.Logic.HostLogic.ValidateConnectionDetails(HypervisorConnectionInternal connection, Boolean checkAllConnectionAddresses) Reason : VCenterExpectedConnectionException Message : Exception of type 'PluginUtilities.Exceptions.VCenterExpectedConnectionException' was thrown. Sdk Error Message : The connection found an ESX server at the supplied address, where a vCenter server was expected. Sdk Error ID : Citrix.XDPowerShell.HostStatus.ConnectionNotVCenter,Microsoft.PowerShell.Commands.NewItemCommand ErrorCategory : NotInstalled DesktopStudio_PowerShellHistory : SimplePowerShellScript 6/4/2019 11:10:00 PM Set-HypAdminConnection -AdminAddress "localhost" -BearerToken ******** New-Item -AdminAddress "localhost" -BearerToken ******** -ConnectionType "VCenter" -CustomProperties "" -HypervisorAddress @("https://192.168.2.99/sdk") -Path @("XDHyp:\Connections\f9044032-68f9-4b68-b3d9-1207162a80fa") -Scope @() -SecurePassword "System.Security.SecureString" -SSLThumbprint @("1EE6A53321158D950AEFF09C3849167225805AD0") -UserName "root" New-Item : The connection found an ESX server at the supplied address, where a vCenter server was expected. + CategoryInfo : InvalidOperation: (:) [New-Item], InvalidOperationException + FullyQualifiedErrorId : Citrix.XDPowerShell.HostStatus.ConnectionNotVCenter,Microsoft.PowerShell.Commands.NewItemCommand New-Item : The connection found an ESX server at the supplied address, where a vCenter server was expected. + CategoryInfo : NotSpecified: (:) [New-Item], InvalidOperationException + FullyQualifiedErrorId : System.InvalidOperationException,Microsoft.PowerShell.Commands.NewItemCommand Studio_TargetHost : localhostInner Exception:
System.InvalidOperationException The connection found an ESX server at the supplied address, where a vCenter server was expected.
Long story short, we need to configure our Citrix hosting connection to talk to a vCenter server, and not directly to an ESXi host. So, let’s reconfigure things to point to vCenter.
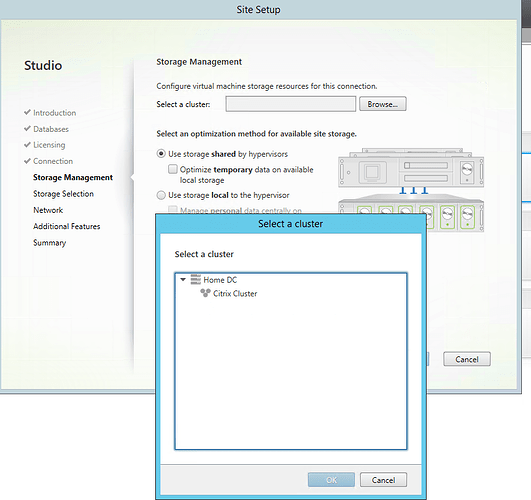
Happy days! Now, let us proceed with configuring the cluster and the storage we will use to provision a workload.
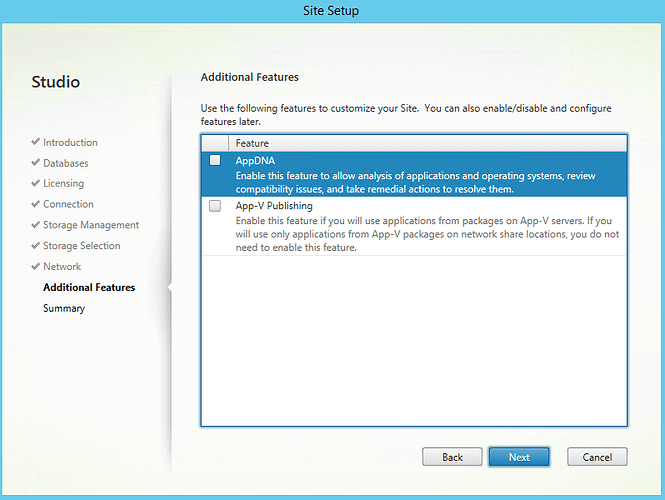
We then choose what additional features we would like to add. In our case, we are not going to be adding AppDNA (Enable this feature to allow analysis of applications and operating systems, review compatibility issues, and take remedial actions to resolve them) or App-V Publishing (Enable this feature if you will use applications from packages on App-V servers. If you will only use applications from App-V packages on network share locations, you do not need to enable this feature)
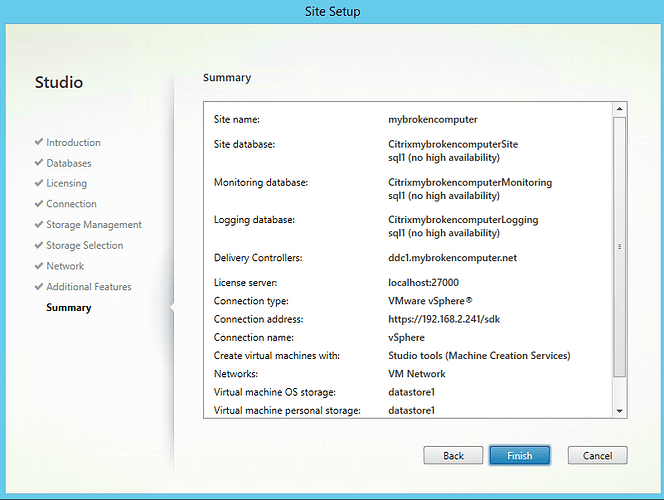
Confirm everything!
And proceed with the installation. This takes 10 minutes or so, when you are treated to awesome dialog such as this.
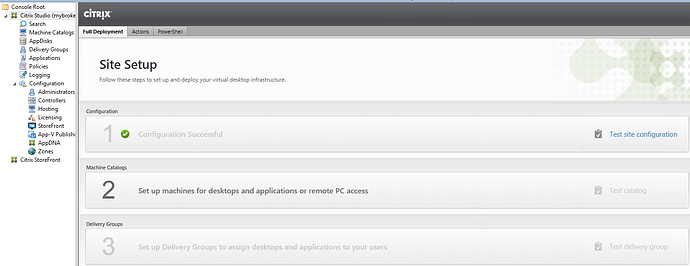
Success - the site has been successfully setup.
At this point, Citrix Director should also be working. You can verify by browsing to http://addressofdeliverycontroller/Director
Part Six Configure Citrix Storefront
By default Citrix Storefront is not installed as part of installing Citrix studio it is a separate component that needs to be installed independently. The installation itself is pretty straightforward it’s really 2 clicks next next next and install. once the installation completes you’re prompted to configure the store I’m gonna walk you through it and do in this blog post.
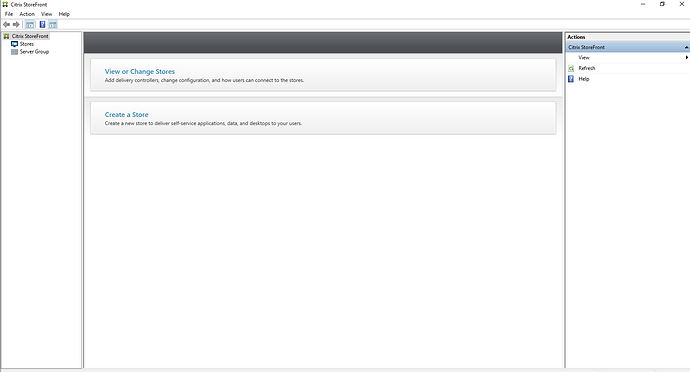
Assuming the installation of storefront went as expected you should be presented with the screen it looks like the below.
As this is a new install we are going to click on create store
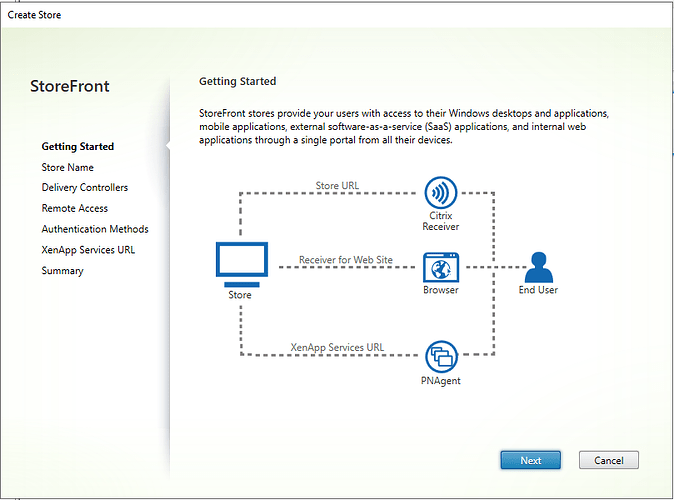
Hit next on this screen, as is is outlining how storefront is used.
Storefront stores provide your users with access to their windows desktops and applications, mobile applications, external software as a service applications, and internal web applications through a single portal from all their devices
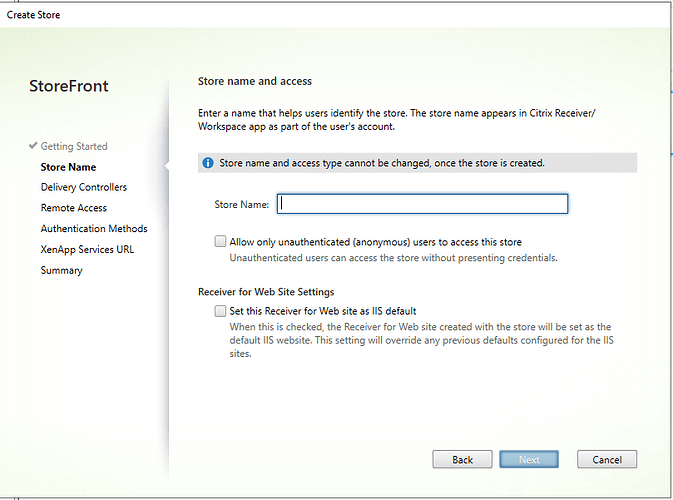
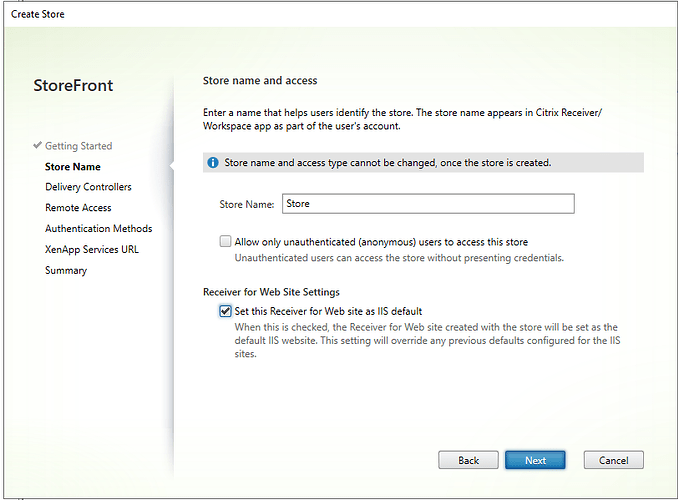
Here we need to configure it the store name and grant access
As this is our lab environment were gonna give it a creative name and call it “store” and we not going to allow unauthenticated users. We will also make this the default receiver for website in IIS
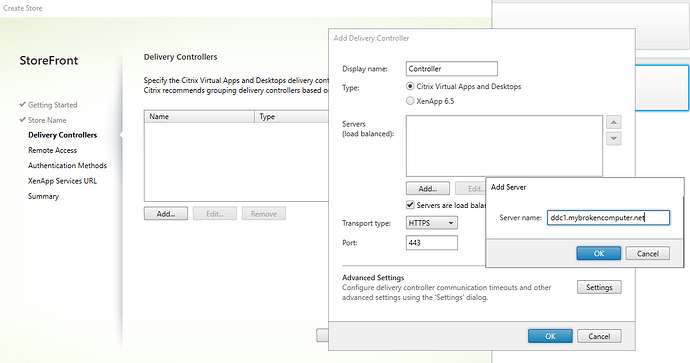
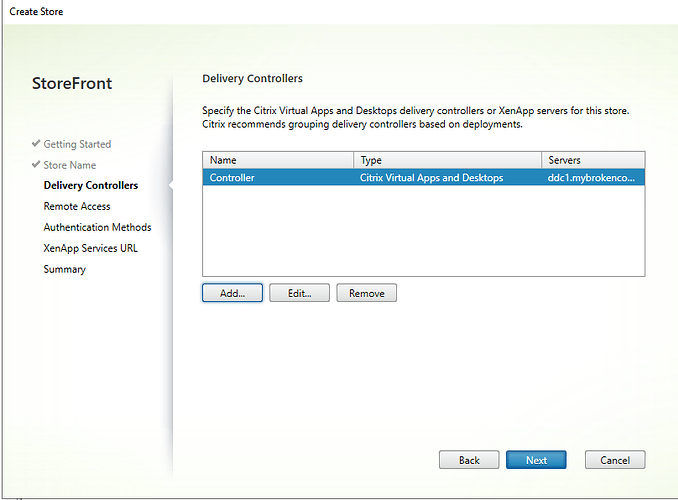
On the next screen we need to let Citrix storefront know about our delivery controllers. In it in our case we only have one controller so the configuration is very straightforward. We click on add, and give it the hostname of our delivery controller.
Specify the Citrix virtual apps and desktops delivery controllers or xenapp servers for the store. Citrix recommends grouping delivery controllers based on deployments.
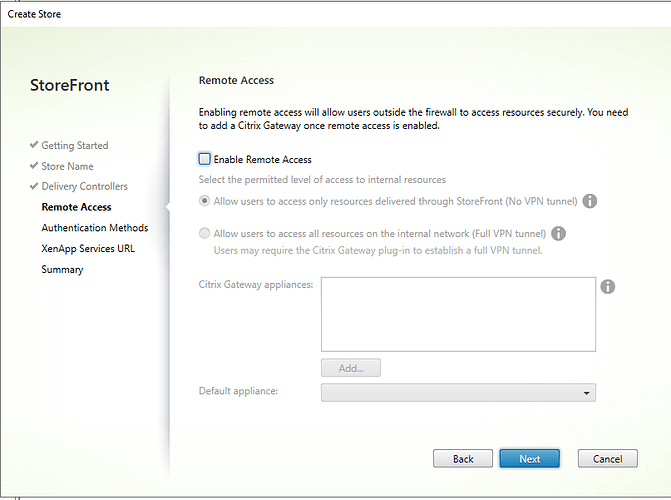
As this is our lab environment we will not be granting remote access so we can leave everything blank on this page
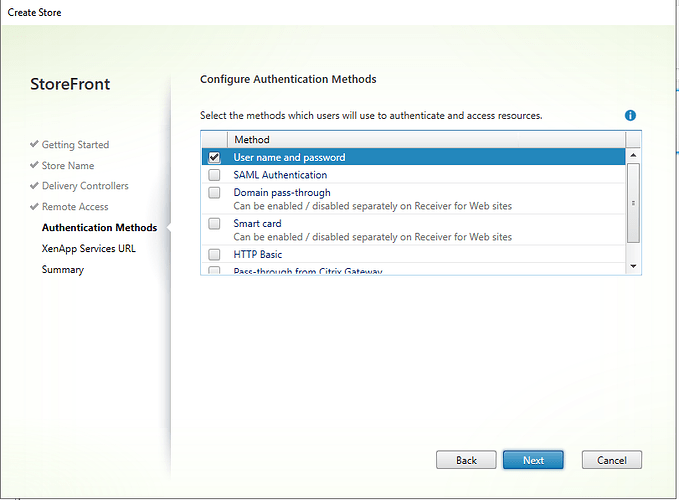
On the next screen we need to configure our authentication methods some of the methods available to was our street username and password SAML authentication tomane passed through smart card HTTP basic and pass through from Citrix gateway. We wil be using straight username and password here.
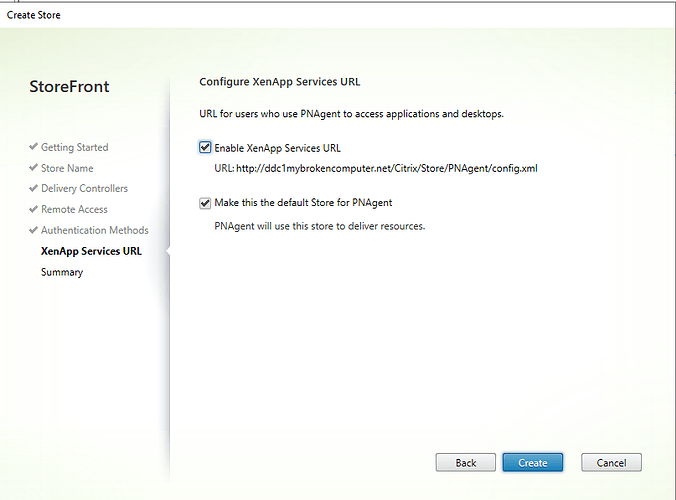
On the next cream need to configure our app services URL it’s pretty safe to leave this is default and just hit create.
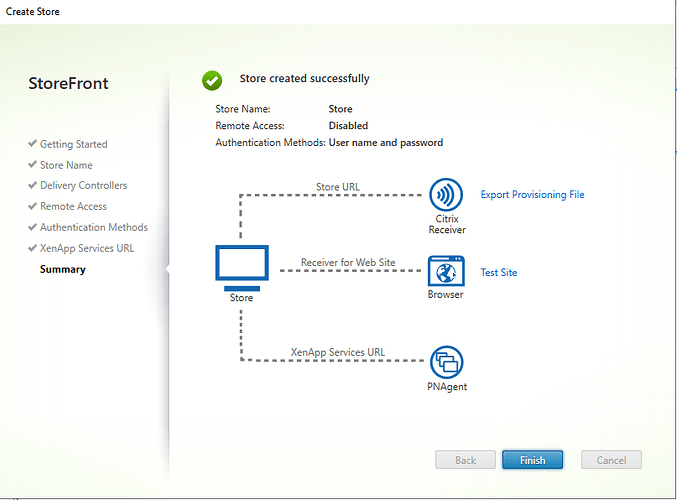
The store creation only takes a couple of minutes remember at the end of the day the store simply and IIS site.
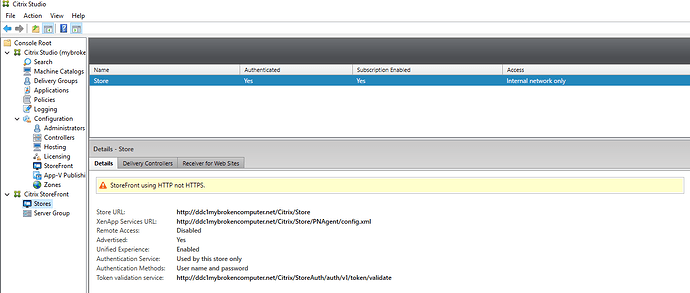
Now that the process is complete we should see a store within our studio console.
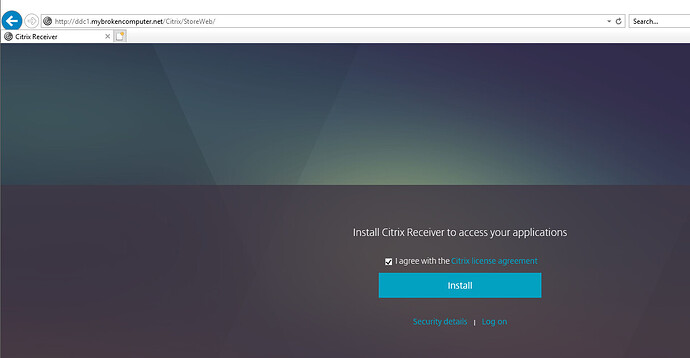
additionally we should be able to browse to the store front URL and log into storefront so let’s test that. Open a browser, and enter the URL of your Storefront Store. In my case the url is https://dd1.mybrokencomputer.net/Citrix/StoreWeb
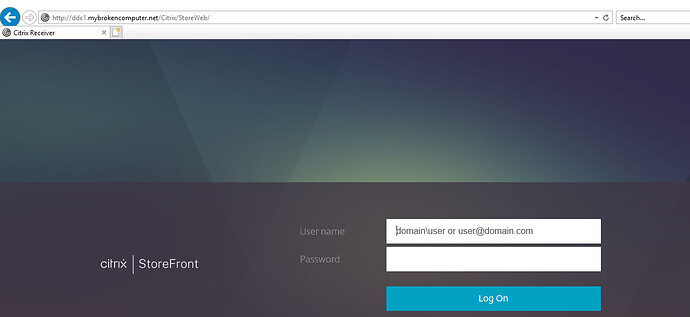
Click the logon button, and you should see the following screen where you can enter your AD credentials to access the store.
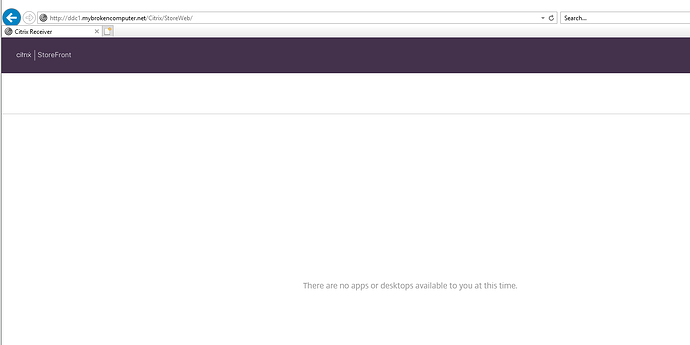
Once you have entered your username and password, you should see an empty storefront server. This is normal, as we have not yet created our VDA devices. We will do that in the following steps.
Part Seven - Configure Citrix VDA devices
Part Eight - Install Citrix App Layering Appliance (Enterprise Layering Manager or ELM
Part Nine - Install Citrix Workspace Environment Manager
If you have come this far in the blog post, well done. It’s been a long slog, but the end is in site. We are well into the “nice to have” components of Citrix. This brings is to Citrix Workspace Environment Manager, one of the real powerhouses in the Citrix admins arsenal. So, what is WEM, and why should I care about how to install it. Here is the official Citrix explanation.
Workspace Environment Management uses intelligent resource management and Profile Management technologies to deliver the best possible performance, desktop logon, and application response times for Citrix Virtual Apps and Desktops deployments. It is a software-only, driver-free solution.
Resource management - To provide the best experience for users, Workspace Environment Management monitors and analyzes user and application behavior in real time, then intelligently adjusts RAM, CPU, and I/O in the user workspace environment.
Profile Management - To deliver the best possible logon performance, Workspace Environment Management replaces commonly used Windows Group Policy Object objects, logon scripts, and preferences with an agent which is deployed on each virtual machine or server. The agent is multi-threaded and applies changes to user environments only when required, ensuring users always have access to their desktop as fast as possible.
Lots os nice words, but what does that mean. Think of WEM as a complimentary tool to GPO, with some added “spice”. One of my all time favorite pieces of WEM, is to control the amount of CPU or RAM that a session can use. This is especially important for those of you who are doing session based computing and have to deal with the 'noisy neighbor’s So, let’s get on with installing the components, of which there are several.
Citrix Workspace Environment Management Infrastructure Services Setup
Citrix Workspace Environment Management Console Setup
Citrix Workspace Environment Management Agent Setup
Below is a screen capture of what is in the .zip file that you download from the Citrix website.
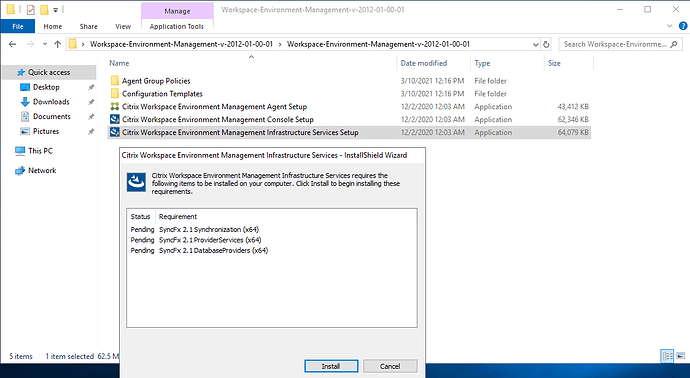
No instructions, a readme file. Nada. So, here we are. The first thing we are going to need to do is get the ‘server’ components of WEM installed. In WEM parlance, that is the infrastructure server. So double click on Citrix Workspace Environment Management Infrastructure Services Setup and follow the prompts/ The first of which is to install the prerequisites that are more than likely missing from your server.
Hit next, and allow the prerequisites to install. Now onto the core application.
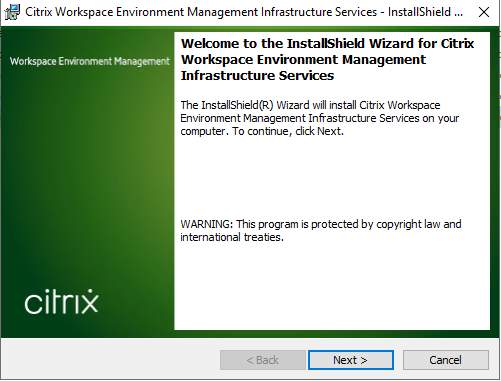
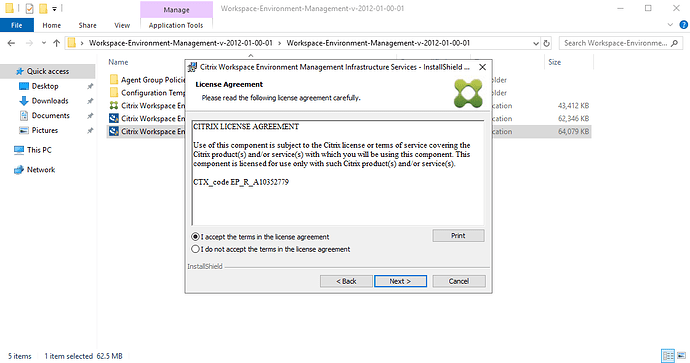
Pay the lawyers, by accepting the EULA.
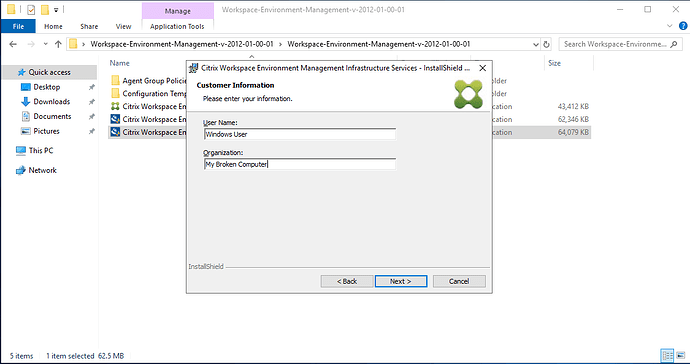
Tell the installer who you are.
We are going to want to do a complete install, but for those of you who are curious, here are the custom options also.
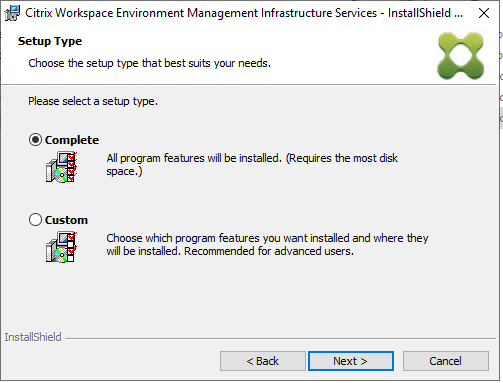
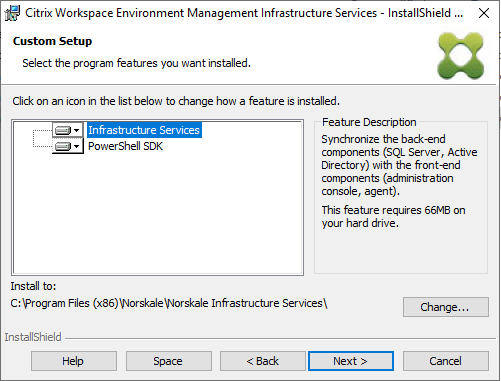
The installer is pretty light, so it installs in a matter of seconds.
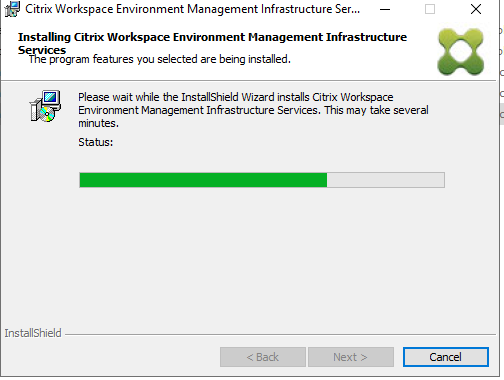
Once installed, we need to configure WEM with a SQL database. As far as I am aware, SQL Express is not supported, so you will need a ful SQL server . Good thing we did that earlier in this post eh?

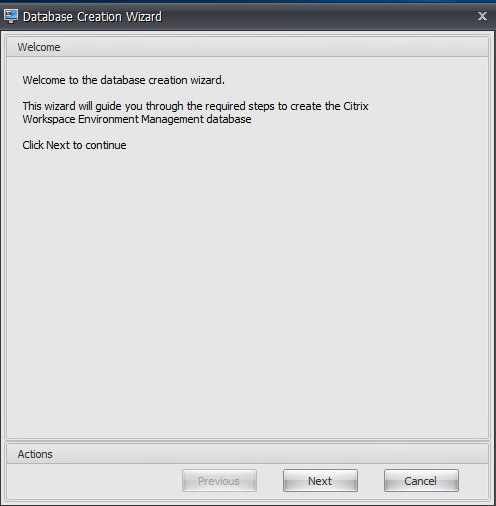
As this is a brand new installation, we are going to have to create a database.
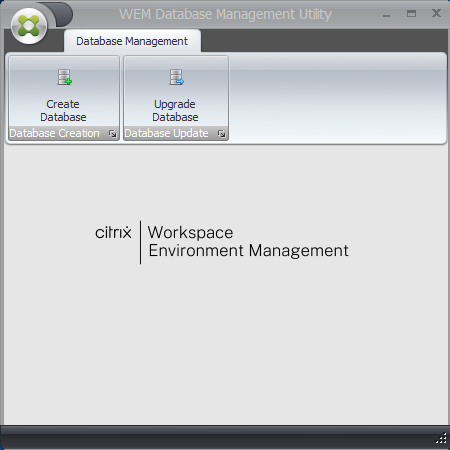
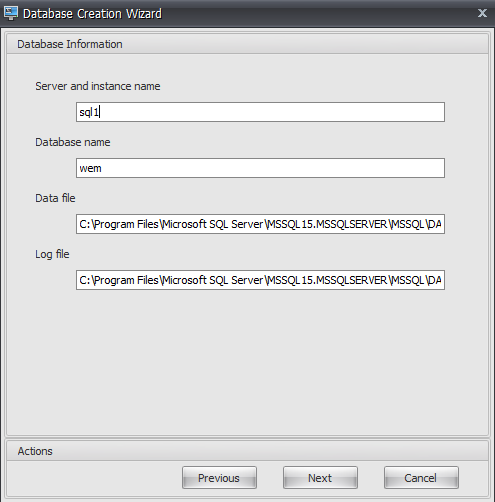
We need to provide our SQL environment information. Be sure the appropriate firewall ports are open on your SQL server to allow the connection to occur.
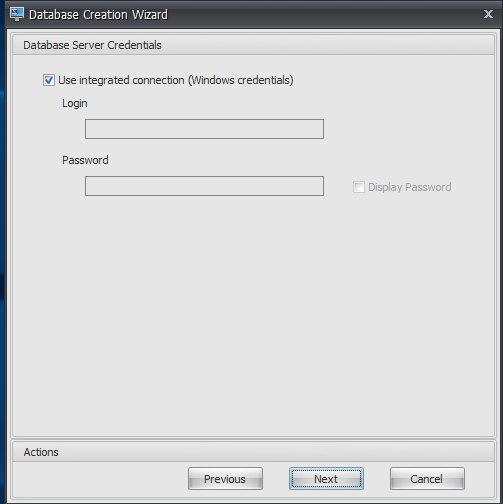
You have the option to use integrated windows authentication, or define a separate account. To keep things simple, we are going to use Windows authentication.
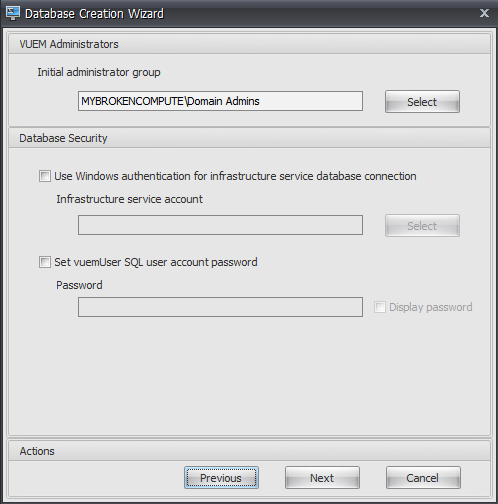
Security time! We need to define our administrators. As this is our lab, we are going to use Domain Admin. Do NOT do this in a prod environment. Remember Role Based Access Control (RBAC).
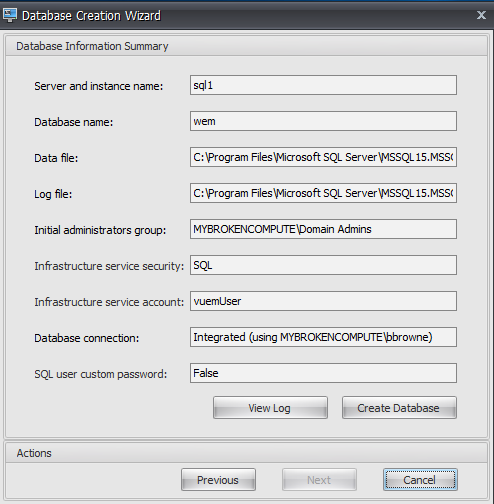
Once done, it asks you to confirm your settings, before creating the database.
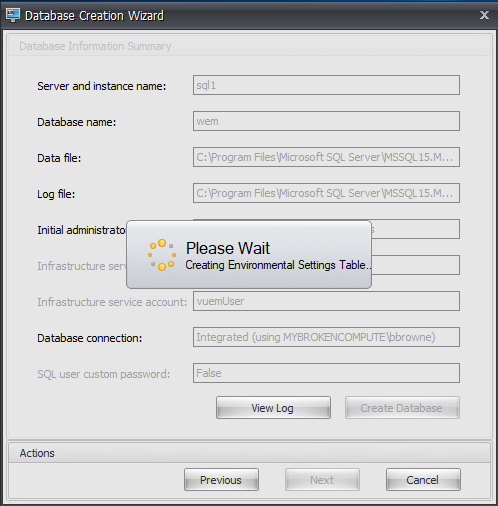
Let it churn away as it creates the database, and all the tables. This can take a little while.
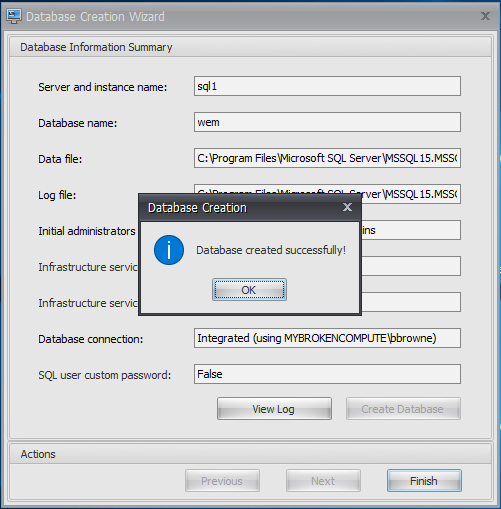
If all goes well, you will see this.
Click finish. That’s it for the DB config, so we can close out this app. We now need to install the Citrix Workspace Environment Manger Console Setup application.
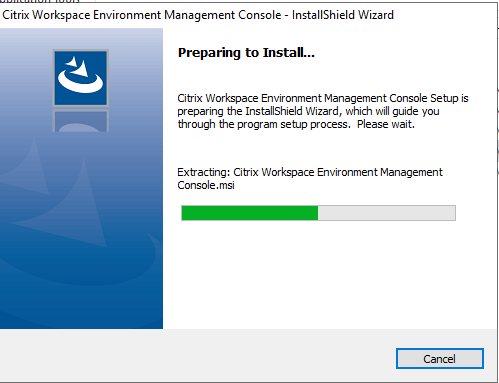
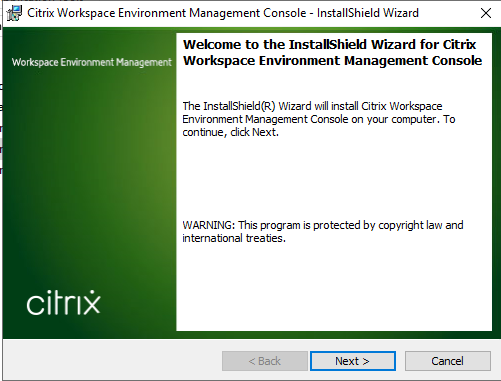
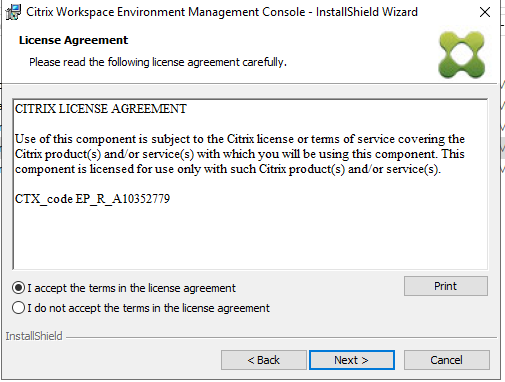
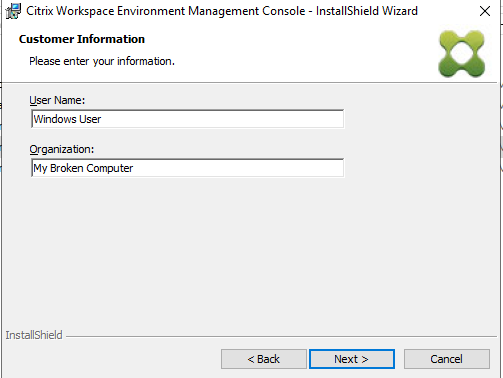
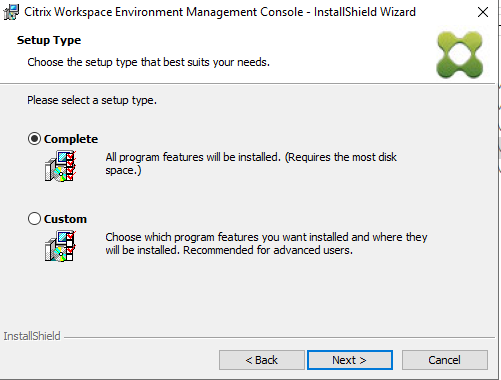
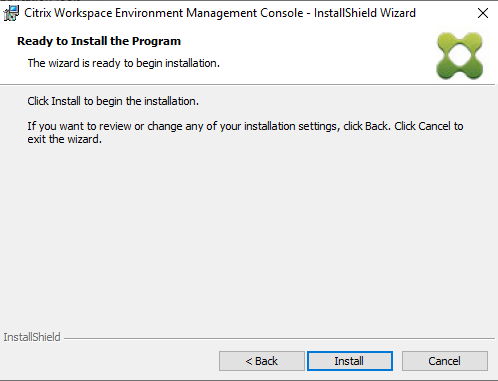
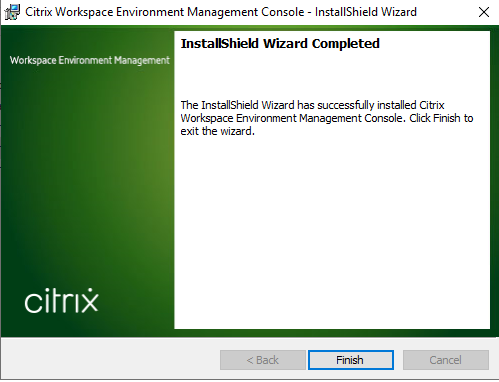
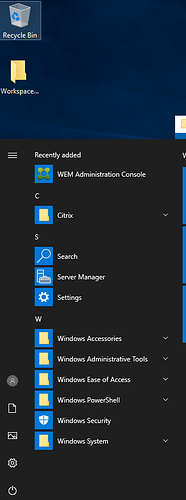
We should now see the WEM Administration Console under the start menu.
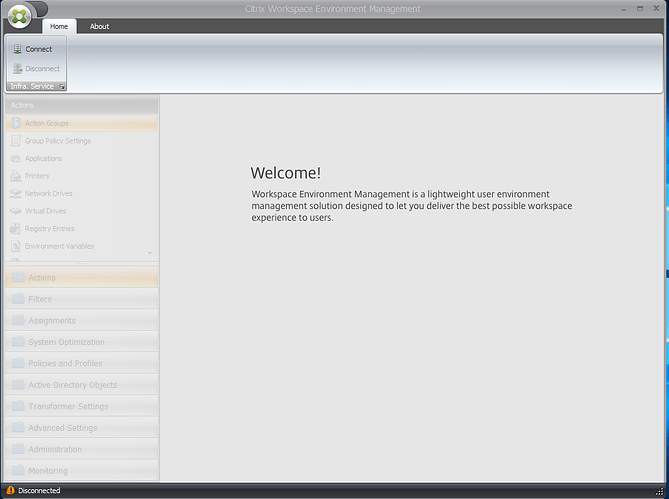
After clicking on that, we see the following which could be concerning if you did not know WEM was originally developed by a company called Norskale. Come on Citrix, time to update this.
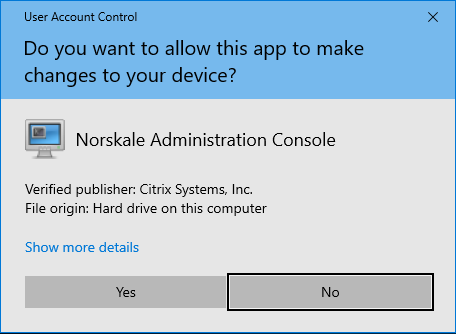
Now that the console is installed, we need to connect it to our infrastrucutre, by clicking on the connect button in the top left.
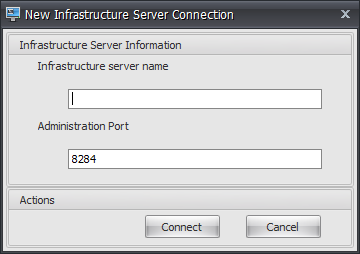

In our case, we are connecting to local host, so lets’ go!

Or let’s not.
After poking around, it looks like the Norskale (remember those guys)Infrastructure Service was installed as a manual service and needs to be started manually. I have also changed the startup type to automatic.
Now, lets try and connect again shall we?

That looks more promising.
Until its not.
Into event viewer we go. And look what I found here. No where have I seen mention of any licensing, so time to dig some more.
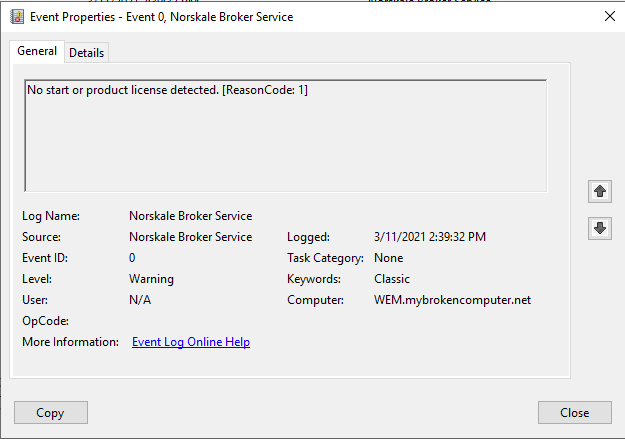
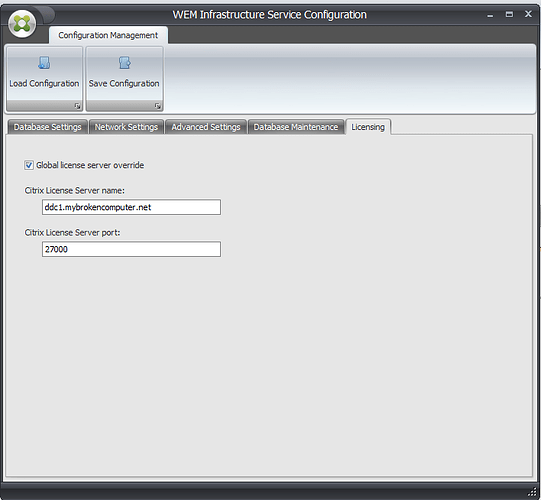
I go back into the DB utility, and discover that there is a non mandatory field for license server, so I populated that, and tried again.
Now when trying to connect the console to the infrastructure, I get a license error, which I thought I just fixed.
From here click on about, and configure license server.

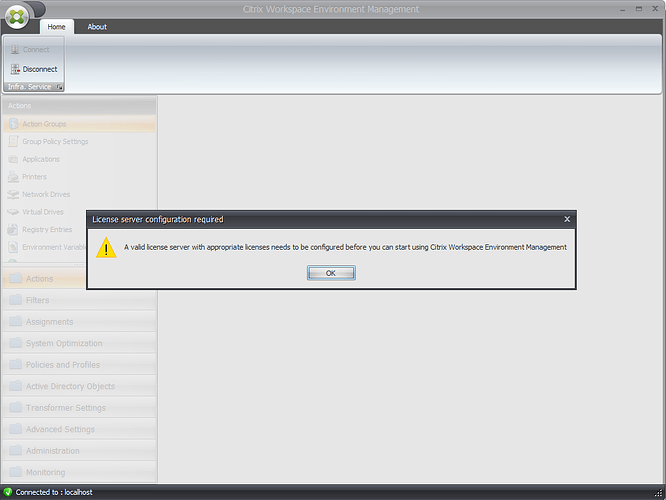
Now I get this.
A valid license serer with appropriate licenses needs to be configure before you can start using Citrix Workspace Environment Management. OK, all the firewall ports are open, and the license server is configured correctly, so let’s look at the licenses in the license server.
From what I can tell, the starter license that comes with the Citrix 30 day trial will NOT work with WEM. So, sorry about that. I am going to reach out to CItrix to see what can be done about it.

